
The room was filled with a smell of night and firs, and Moomintroll thought: “Good. A family has to be ventilated at times.” He went out on the steps and started out into the damp darkness.
“Now I’ve got everything,” Moomintroll said to himself. “I’ve got the whole year. Winter too.”
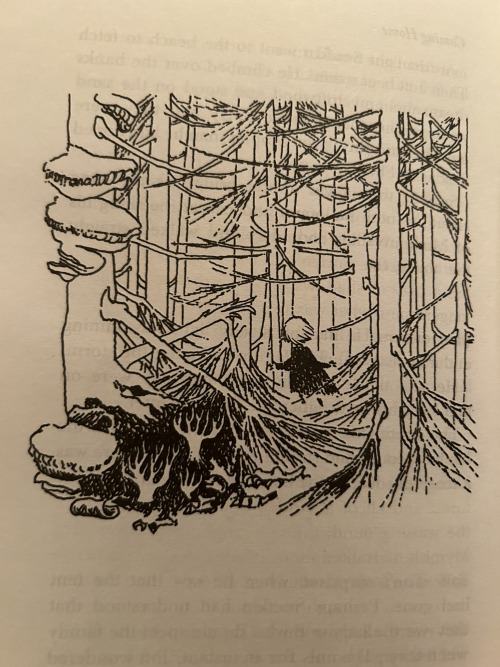
“It was a different world. Toft had no pictures and no words for it, nothing had to correspond. No one had tried to make a path here and no one had ever rested under the trees. They had just walked around with sinister thoughts, this was the forest of anger. He grew quite calm and very attentive. With enormous relief the worried Toft felt all his pictures disappear.”
Turn on CC/subtitles for English lyrics
Bret Victor in a talk with profound implications for modern communications:
“The wrong way to understand a system is to talk about it, to describe it. The right way to understand it is to get in there and model it and explore it. And you can’t do that in words. And so what we have is people are using these very old tools — people are explaining and convincing through reasoning and rhetoric instead of the newer tools of evidence and explorable models. We want a medium that supports that… that is naturally show and tell.”
Related posts are below the talk.
I wrote about my time at The Intercept
Tips on using the Espro P7 coffee press

I make coffee using a stainless steel, double filter, 32 oz french press called the Espro P7. It’s a big improvement over conventional french presses — producing a cleaner cup and keeping coffee hot and insulated — but you may need to substantially alter your brewing process to obtain an equivalent cup of coffee, particularly if you are a bit finicky about coffee. Below are some tips
It brews more quickly
The P7 seems to need about 25 percent less time to extract equivalent flavors from a given amount of coffee than a conventional glass press. I hypothesize this is due to the insulated stainless steel walls keeping the water hotter during the brew process.
You may need a trick to keep the lid on during brewing
The P7 has a double filter exposed to coffee both below and on the side of the plunger. This innovative design is superior to a conventional flat, single filter at removing coffee bean particulate from your brew slurry, but occupies much more space in the press:

With a conventional press, the filter protrudes below the lid only perhaps 1 cm and it is no problem to keep the lid on while brewing by simply retracting the filter into an “up” position. With the P7, retracting the filter in this way creates perhaps 5cm+ protrusion, seriously limiting how full the press can be, particularly if you do not wish the grounds to be touched by the filter. In fact, I had trouble filling even to the “minimum” fill line in the beaker with the lid on and filter attached.
Nonetheless, you can brew the P7 to maximum capacity with the lid on by simply removing the plunger mechanism from the lid prior to the start of brewing. This involves unscrewing the filter from the plunger stem, perhaps five seconds of work (and something you do when cleaning anyway). Then remove the plunger stem. Then you put the lid on by itself. Then you attach the plunger and screw on the filter before brewing.
(In practice you don’t actually remove and re-attach the filter every time you brew. You just never put it on in the first place, after disassembling it to clean, then you attach it when it is time to plunge.)
There is no need to let the coffee fines “settle” after you plunge
With conventional french presses, some connoisseurs like to give 30-60 seconds after they plunge to allow fine particles that made it past the filter to settle on top of the filter as gravity pulls them down; this keeps them out of the dispensed coffee. The technique is suggested by (for example) James Hoffman and Tim Wendelboe. It is superfluous in the Espro P7 in my experience, so you can just skip that step.
(One exception: I have found more darkly roasted beans that are ground quite fine, for drip coffeemakers, can, in fact leave particulate that makes it past even the P7 filters. This is not an issue for me now since I have moved to a slightly coarser grind, see next section.)
You may want to adjust your grind settings
If you are still grinding your beans quite coarse for french press, buying a P7 offers a good excuse to experiment with finer settings, since the filters can handle finer grinds. You may find more desirable flavors are extracted from the coffee at finer grinds, and/or that brew time may be shortened.
Conversely, some people, per Wendelboe and Hoffman above, were already grinding finer for the french press than conventional wisdom has historically dictated, for example all the way down to drip coffee maker levels. They may find that the higher, more even brew temperature of the insulated P7 actually encourages them to go a couple of notches more coarse. This is because the hotter water in the P7 is extracting more flavor from the beans, and, for the same quantity of coffee and brew time as a conventional press, may produce bitter and overexacted coffee, particularly at fine grind settings.
Personally, I use a Baratza Encore burr grinder, and went from a setting of 15 (drip) with my Bodum to a setting of 21 (Chemex) with the P7. The Encore manual suggests a setting of 30-32 for french press, in keeping with traditional advice for conventional press filters.
Consider making more coffee in fewer batches
When I used a Bodum french press, I would make one cup of coffee at a time, three times per morning. This ensured that each cup was hot and properly extacted; the filter on a conventional press exposes too much of the used coffee grind to any liquid left in the beaker, in effect continuing some of the brewing process rather than properly holding the coffee.
With the P7, not only does the coffee retain more heat due to superior insulation, it is also much better sealed off from the coffee at the bottom of the pot. So now I make all three cups at once. It can take me an hour or two to dispense all the coffee and it remains very good.
A note: The P7 is actually bad at making small batches like a single cup of coffee. It retains so much brew under the filter compared to a conventional press that it is pretty inefficient to make a single cup. Espro makes smaller models if you want to make a single cup.
You will “waste” a bit more coffee
Even brewing a near full press of coffee at a time, the P7 seems a bit less efficient than my Bodum, Since the filter rides higher up the sides of the pot, per the picture above, it seems more volume is left outside the filter.
I intended to quantify this difference with a test, but unfortunately my Bodum pot shattered before I could do this. I can report that the P7 yields about 850ml of coffee when you brew 1100ml of water and 61g of coffee beans. Although this seems significantly less efficient than the Bodum, it is completely worth the slight extra waste, in my experience, to get the superior tasting coffee. The espro coffee tastes so much “cleaner” I can’t go back.
Bringing it all together: How I brew
So given all the above this is specifically what I do to brew an excellent cup of coffee in a P7, in case anyone finds it useful. For context, my water is always 208F (via our trusty Zojirushi pot).
(Remove plunger rod and filter from lid per above if not already separate. I always leave mine separate after washing.)
Ensure the two filters, detached from the lid, are twisted and clicked together. This will make it faster to attach them later.
Grind 61g coffee at medium coarse (Chemex, 21 on Baratza Encore), put into P7 pot.
Put pot on scale, zero scale. Start count up timer.
Fill pot with 1100g (ml) of water, making sure to wet all grounds.
Put lid on pot.
At 1 minute 20 seconds, remove lid, stir grounds, re-attach lid.
At 2 minutes, remove lid, stir again, skim foam from top with a spoon (per Wendelboe in this video at 3:30).
Attach plunger to lid: Put plunger rod through lid, screw filters on to it.
At 3 minutes, place plunger + lid on top of press and press.
Dispense and enjoy coffee, returning to pot for more as needed. It stays pretty hot! In fact, I pour half cups initially in order to let the dispensed coffee cool more rapidly.
Notes
As you can see, I brew at a 1:18 coffee:water ratio, which works well for the beans I buy, which tend to be medium roast and relatively fresh. I also prefer sweet flavors to bitter; based on what my local coffee shops serve, other folks seem to enjoy more bitter compounds and may like a richer ratio.
I also think finer grinds will probably work well with the P7, given (probably) some adjustments to the timings above, although some beans (darker roasts) seem to “shatter” more in the grinder into finer particles which can escape the P7 filter, and for those you may want to experiment with providing time for the grounds that make it past the P7 filters to settle.
The Big Lebowski supercut that emerged from a rather stressful period
At one point around 2010 I was researching and writing a book while working full time as a gossip blogger at a very fast-paced website. I was basically working both weekdays (on the blog) and weekends (on the book) and as the stress built I coped by making elaborate fatty foods, shaking increasingly esoteric cocktails, and watching the Big Lebowski, which had been something of a touchstone since I saw it as a fifth year senior at Berkeley.
The cocktails and the fatty food paired well with the Lebowski, and the newly invented iPad allowed me to combine these activities in bed, until my laughing and spilling woke up my wife one too many times and my little Lebwoski parties were banished to the couch.
Anyway the book was successfully published and the blogging job gave way to a slightly slower paced magazine/website job. After a breather I released some audio transcription software I had written during the book project. But I never got around to releasing a video I had made in the same period about the Big Lebowski. Until today.
It’s truly the work of a disturbed mind. While watching the movie literally dozens of times I was able to notice, despite the whisky sours and daiquiris and martinis and yes White Russians, that the filmmakers (Coen Brothers) repeated certain phrases and speech patterns a lot, seemingly strategically. This is, it turns out, a known tick of theirs, but I was curious the meaning, and threw myself into compiling examples of the repetition and reading books about the movie.
After I compiled enough examples in a text file I decided to begin splicing copies of those examples out of a digital copy of the film and smushed them together into a sort of rough “supercut” compilation. Then I spent months (very occasionally) obsessively editing and adding new clips to these supercuts. Then I would forget about the project for months or years, watch the last supercut, and make a new, better, version.
Anyway it looks like the last version I made, version 24, was done in January 2019, and the one before that was made in 2015. And it looks pretty good! If you really like the movie maybe give this compilation of repetition a watch, I think it builds and builds and toward the end you may find some examples you had not noticed before. Only 1 minute 48 seconds and pretty fast paced. Enjoy.
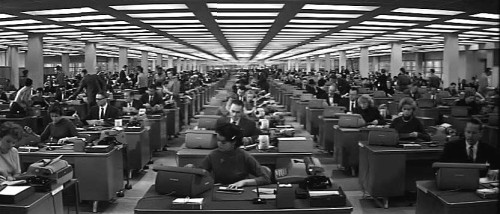
The Tyranny of News
For centuries the cost of distributing information polarized publishing between books, which were comprehensive and timeless, and newspapers, which were essentially diffs of information in books. Centuries ago, as today, understanding a newspaper was impossible without a lot of background knowledge, although back then you were more likely to have this context, your leisure options and reading choices being quite constrained.
The cost of printing and distribution, and in particular the cost of books, constrained the availability of material that might bridge this gap and educate readers about topics that were both vital and complex — information that was a bit timely and a bit deep, with a medium shelf life, neither entirely fresh nor perfectly comprehensive. This sort of information, with the potential to quickly educate the citizenry, particularly as society grew ever more complicated, tended to get published only when there was a particularly strong political or commercial imperative to justify the cost. Revolutionary era pamphleteers, door to door encyclopedia salesmen, and independent product guides like the Whole Earth Catalog come to mind.
For some reason, 25 years into the age of widespread internet use, we have only begun to disrupt this paradigm. In fact, news has proliferated online, and in this medium tends to provide little to no additional background information as compared to print, offering an occasional hyperlink that provides precious little additional context, and mostly contemporaneous context at that (that is, news articles tend to link to other news articles or to press releases or the like). Many of the new information forms that have emerged online only serve to heighten the importance of news or even more ephemeral information: Aggregators like Reddit (adding only importance ranking and brief comments), social networks like Twitter and Facebook (heavy on opinion and personal moments), and the democratic cinema of YouTube (tending toward the viral and off-kilter). Books, meanwhile, seem to have changed very little online, although
their digitization has made them more conveniently available, and,
arguably, slightly widened the number of authors of which a given reader
avails herself.
This state of affairs is odd, given that the web was created by a scientist with the specific complaint that “keeping a book up to date becomes impractical,” in particular when organiziing “general information about [nuclear] accelerators and experiments,” which would seem to envision a platform that accomplishes quite a bit more than circulating newspaper articles.
But if you’re attentive you can start to see examples of how the web can foster new forms of information that go further than news in educating citizens, providing a deeper understanding on a range of topics before, or in the absence of, relevant books. To wit:
- Wikipedia - A resource that is both criminally underfunded and routinely underestimated but which nevertheless dominates both the Google results and reader mindshare for any given topic. Why? Because it takes the time to go deeper (and thus more educational) than news; because it organizes by topic rather than by what recently happened; and because it has relentlessly honed a useful system for harnessing the work of a distributed team of volunteers (the sort of work news organizations would be wise to engage in more often).
- StackOverflow - A network of sites that has brought about nothing short of a revolution in how software engineering knowledge is exchanged. The site was consciously designed (per the podcast made by its creators as they created it) to foster knowledge with a considerable shelf life, information that for months or years would surface on Google to help programmers looking for solutions to their challenges. The system of software, rules, and human moderators used to make this happen is so consciously attuned to this goal that it is routinely criticized for being so strict as to border on unwelcoming. And at times the site fails to keep pace with the rapidly churning world of software libraries that have become central to applied computer science. But no one has argued that StackOverflow failed to achieve its primary goal. Its business model, the last time I checked, revolved around helping tech companies hire engineers.
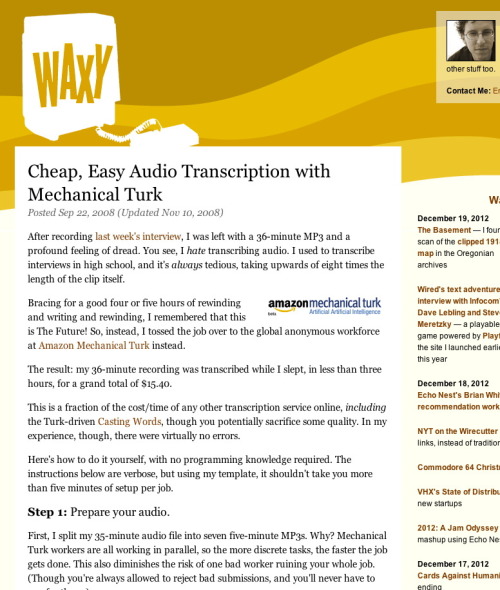
- Wirecutter - A site that creates product guides with a shelf life of approximately one year and which has changed how many people buy things online. Wirecutter has become so widely used and imitated that it’s easy to forget that this format had to be invented, and invented at that by Brian Lam, who as editor of Gizmodo had overseen the production of a great many reviews with much narrower scope and a much shorter shelf life. After he retired from Gizmodo to Hawaii he made a site with a much more laid back pace and, relatedly, with more depth and educational value per article.
I think we are going to see more sites that fit this general mold — medium shelf life, between books and articles; greater depth and educational value than news articles, but less than books; relying more on expertise and less on reporting. This is the part of the web, and of publishing, and of the digital world, that really excites me right now. It is where we as a society are going to heal some real systemic weaknesses and build some real strengths. And how we will finally end the tyranny of news.
Renée French, actor, nurse, just needed a little space

Before she died last month, Renée French was a nurse at New York Presbyterian Columbia Hospital. At some point before that, she rendered an unforgettable performance in downtown indie film icon Jim Jarmusch’s Coffee and Cigarettes as herself, or at least a version of herself with the same name, leafing through a gun magazine in a restaurant. She was poised and smoldering, gracefully insisting, to a persistently helpful waiter, that she be left alone to simply drink her coffee. “I really wish you hadn’t done that,” she says at one point, as he pours an unsolicited refill. “I had it the right color, the right temperature — it was just right.”
Coffee and Cigarettes was released in 2004, but French’s scene was shot some time during the preceding 18 years, during which Jarmusch filmed the movie’s 11 distinct stories. It’s not clear how much acting she subsequently did; IMDB lists just one other performance credit. Presumably, French might have found more work had her performance in Coffee been released sooner. (Jarmusch did try to do so, at one point reportedly nearing a deal to showcase the shorts on MTV before concerns about glorifying smoking scuttled things.)
After Jarmusch memorialized French on his Instagram, photographer Stephen Torton wrote about her recent life, saying in a comment, “Renee was a single mom and a front line nurse who died after months of near round the clock work.“ Another commenter wrote, “ She helped my mom when she was at her lowest during the peak of this pandemic. I’ll be forever grateful for her compassion and love for helping others.” French was a longtime New Yorker, and other friends remembered her working at and patronizing various downtown bars in the 1990s. “She cared about fellow humans,” one wrote. Jarmusch remembered her as “a truly rare and remarkable human being… kind, selfless, beautiful.”
It’s clear, in other social media posts, that French was grappling with the emotional toll of her work. At one point she wrote, as the pandemic waned, “I am struggling coming out of this ‘dream’.” Another time: “Just wanna have a few drinks and SLEEP.“
In the week and a half since I learned of French’s death, my thoughts have repeatedly returned to her. I saw Coffee for the first time maybe a month ago, part of a Jarmusch binge that began in March, as the city began its move indoors. In her work we see that peace is necessary for compassion, that providing solitude is as much an act of love as active care. I wish as a city and community we could have provided Renée with more of these things, and looking at what we together have gone through, and what many brave people have fought for, these last few days, I think they clearly are also needed by our most vulnerable citizens. Let people alone to live in peace, to care for others and to pursue happiness.
The new microjournalism
I’m noticing a new sort of news site: Supported by philanthropy and reader contributions and focused on a relatively tight niche.
One example would be the venture forthcoming from Julia Angwin and Jeff Larson, who will build a team to cover algorithms and “the impact of technology on society.”
Another might be The Trace, focused on gun violence in the U.S.
Then there’s The Appeal, which is zoomed in on local prosecutors across the country.
One obvious benefit of this model is that it can be very attractive to donors, from major individual givers to grant committees to readers and grassroots activists. They get a clearer sense of what they are supporting than they might with a broader news organization. As reader and philanthropic support becomes more central to the sustainability of journalism, this clarity becomes much more important. At the same time, as advertising revenue falls away, raw scale (pageviews, unique visitors), which has tended to mitigate against journalistic focus, becomes less important.
Another benefit of the microjournalism model is that the community of readers, tipsters, commenters, and social media posters that forms around the site might tend to be more impassioned.
The downside, I’d imagine, might be a lower bound on the size of that community. Of course, a niche site that succeeds can always broaden; Angwin and Larson, for their part, have clearly scoped out a meaty topic beyond algorithms, for example, and envision, as Angwin put it, “a substantial newsroom that aims to publish daily.”
There is, of course, an old microjournalism, but it was and remains commercial — the trades, who cover any conceivable topic where a critical mass of advertisers can be found. At one point during the dot-com downturn of the early aughts, a coworker and I at a tech magazine joked that we’d end up at one of two competing publications we had discovered covering the practice of raising meat goats.
The trades have been notoriously captured by advertisers. By making it easier to raise funds from, solicit information from, and publish to a small community, the internet may have enabled a journalism that is more adversarial than the trades and blessed with more resources and investigative power than the first wave of individual independent bloggers.

The past two days in New York, with the spring snowstorm and glorious aftermath, have been among the most beautiful since I moved to New York in 2014. (And I’m pretty bad at capturing on my iPhone how stunning Park Slope looks this morning.)
There is no moment, seen properly, that does not contain God, joy, beauty or whatever your particular name for that ecstasy is.
Caterina Fake, possibly referring to a collection of music, Salon.com, 1998.
Goodbye, David Bunnell
I am quoted in Owen Thomas’ San Francisco Chronicle obituary for David Bunnell, a pioneering tech publisher who, along with his son Aaron, gave me my first journalism job at long-gone Upside magazine. He also stared PC Magazine, PC World, and Macworld; working at a pioneering early PC maker called MITS in New Mexico, he edited articles for company’s Computer Notes publication by Bill Gates and Paul Allen about their new company Microsoft’s version of the BASIC programming language.
You can find other obituaries from Harry McCracken and Karen Wickre. Below are my own scattered thoughts upon learning of David’s passing.
Subject: Re: David Bunnell
From: Ryan Tate <ryan.tate@theintercept.com>
Date: Thu, 20 Oct 2016 13:24:50 -0400
To: “Thomas, Owen” <-redacted-@sfchronicle.com>
I had not. This news is devastating, and not just on a personal level, but on a professional one as well, because it comes at a time when the technology sector needs more than ever the sort of humbling, irreverent, technically sharp journalism and satire that David pioneered. I saw all of his work, especially at Upside, where I worked for David and his late, remarkable son Aaron, as paving the way for to critical voices against technological overreach and for publications like Valleywag and The Intercept, which extended the work he helped begin to cut through the zealous optimism and confidence games of Silicon Valley and thus help distinguish true innovation from banal corruption.
What was most brilliant about David, in my eyes, was that he always saw the essential humanity of the Valley, and the nitty gritty implications of technological change for ordinary people, even at times when the prevailing wisdom said that technology floated above, and apart from, mundane human struggles and foibles. This is someone who relentlessly tried to use computers and other innovations to improve the lives of the poor, who gave his own time and energy to help those less fortunate than himself, who was happy to speak the truth about large corporations, who was skilled at mocking self-important executives, and who fundamentally always wanted to bring the personal computing back to where it started o the ideals of a countercultural movement intended to empower those at the margins.
On a personal level, David=’s work was a part of my life long before I met him. I subscribed to Macworld as a teenager and later, in college, was delighted to discover the cheeky online tech industry column he had commissioned from Tish Williams, who wrote Upside's “Daily Tish.”When I entered business journalism after college, the tech boom was in full swing, and the Bay Area was overflowing with reporter jobs, but I didn’t consider applying anywhere but at Upside, where I had been freelancing for David’s son Aaron. When Aaron, all of 26, passed away, David helped pull the rest of us through the emotional devastation, and he did his best to shield us from the industry collapse the followed shortly thereafter. Long after Upside folded up shop, I would see David around Berkeley, and he would talk about his latest ventures, which involved innovations in health. He had my wife and over for dinner; another time we dined together at a local barbecue spot after finding we were both, by chance, enjoying an evening alone at the bar. Though I avoided the topic, I always sensed that Aaron’s loss was an emotional blow from which David never fully recovered. And yet in a way he became warmer, and more alive, in the wake of that tragedy, especially after he had been away a good long while from the Silicon Valley hustle.
I will always be deeply grateful to David Bunnell, a man as loving as he was smart and as critical as he was awe-struck, who saw the potential of technology even as he recognized the emptiness of tech as an ends unto itself. As we are sucked ever more completely into electric screens and the global tangle of wires and radios that network them together, I hope the rest of us learn to keep the world in perspective as well as he did.
> On Oct 20, 2016, at 12:43 PM, Thomas, Owen <-redacted-@sfchronicle.com
wrote:
>
> Ryan, you may have heard of David Bunnell’s passing. Do you have any
memories to share?
>
Introducing Typingpool, My Software for Easy Audio Transcription
Today I’m releasing Typingpool, software that makes audio transcriptions easier and cheaper.
Typingpool chops your audio into small bits and routes them to the labor marketplace Mechanical Turk, where workers transcribe the bits in parallel. This produces transcripts much faster than any lone transcriber for as little one-eighth what you pay a transcription service. Better still, workers keep 91 percent of the money you spend.

You use Typingpool through a series of command-line programs, distributed as a Ruby gem. For the non-geek, Typingpool can be a pain to install, and if you’ve never used command-line programs it will take extra effort to learn. But if you create many transcripts Typingpool can save you a great deal of time and money. And while you have to pay the workers who handle your audio on Mechanical Turk, Typingpool is completely free.
Typingpool runs on Mac OS X and Linux.
Background

To automate, I ended up writing a whole library of Ruby code, after simpler approaches failed. This code became Typingpool. I’ve been using and developing it since Feb. 2011.
How it works

You can cancel a transcription job at any time. You can provide a list of unusual words in the audio so transcribers are more accurate. You can re-assign chunks that have expired or been rejected. You can set deadlines for how long each worker may take on assignment, when assignments are pulled from Mechanical Turk, and how long you have to review an assignment before it is auto-approved.
You interact with Typingpool through a collection of command-line programs: tp-make, tp-assign, tp-review, and tp-finish. You may sometimes need to use the program tp-collect. Another program, tp-config, is used only when installing Typingpool. A simple config file controls defaults (it’s at ~/.typingpool and in YAML format) and a cache file keeps network connections to a minimum.
Output

The project folder also includes supporting files, including a CSV data file used to store raw transcript chunks, Amazon Mechanical Turk HIT information, and other metdata; Javscript code that swaps in Flash players on browsers that don’t support mp3 files in audio tags; the original audio files and the audio chunks generated from them; and a CSS file.
The folder is laid out like so:
  Chad Interview/
      -> transcript.html | transcript_in_progress.html
      -> audio/
          -> chunks/
              -> Chad Interview.00.00.mp3
              -> Chad Interview.01.00.mp3
              -> ... [snip]
          -> originals/
              -> chad1.WMA
              -> chad2.WMA
      -> data/
          -> assignment.csv
          -> id.txt
          -> subtitle.txt
      -> etc/
          -> audio-compat.js
          -> transcript.css
          ->  About these files - readme.txt
          -> player/
              -> audio-player.js
              -> license.txt
              -> player.swf
Details
For further details, keep reading below, or jump to your preferred section here:
- Usage
- Installation
- Configure your Amazon account.
- Install prerequisites(rvm, audio tools, Ruby, and perhaps a package manager).
- Install the Typingpool gem.
- Run tp-config.
- Frequently Anticipated Questions (FAQ)
- Usage: Additional details
- Maintenance
- Problems?
- Source
- More
Usage
A typical workflow will use the bundled scripts in this order:
tp-make -> tp-assign -> [wait] -> tp-review -> tp-finish
tp-review may be called repeatedly, until transcripts for all audio chunks have been processed. Similarly, tp-assign may be called repeatedly, for example to re-assign chunks rejected using tp-review, or to re-assign chunks that have expired.
(An alternate workflow would go like this:
  tp-make -> [manually upload data/assignments.csv to Amazon RUI] ->
    [wait] -> [approve/reject assignments via RUI] -> tp-collect ->
    tp-finish
)
Example:
  tp-make 'Chad Interview' chad1.WMA chad2.WMA --unusual 'Hack Day,
    Yahoo' --subtitle 'Phone interview re Yahoo Hack Day'

     # => Converting chad1.WMA to mp3
     # => Converting chad2.WMA to mp3
     # => Merging audio
     # => Splitting audio into uniform bits
     # => Uploading Chad Interview.00.00.mp3 to
            ryantate42.s3.amazonaws.com as Chad
            Interview.00.00.33ca7f2cceba9f8031bf4fb7c3f819f4.LHFJEM.mp3
     # => Uploading Chad Interview.01.00.mp3 to
            ryantate42.s3.amazonaws.com as Chad #
            Interview.01.00.33ca7f2cceba9f8031bf4fb7c3f819f4.XMWNYW.mp3
     # => Uploading Chad Interview.02.00.mp3 to
            ryantate42.s3.amazonaws.com as Chad #
            Interview.02.00.33ca7f2cceba9f8031bf4fb7c3f819f4.FNEIWN.mp3
     # => ... [snip]
     # => Done. Project at:
     # => /Users/ryantate/Desktop/Transcripts/Chad Interview


  tp-assign 'Chad Interview' interview/nameless --reward 1.00
    --deadline 90m --approval 6h --lifetime 2d

     # => Figuring out what needs to be assigned
     # => 85 assignments total
     # => 85 assignments to assign
     # => Deleting old assignment HTML from ryantate42.s3.amazonaws.com
     # => Uploading assignment HTML to ryantate42.s3.amazonaws.com
     # => Assigning
     # => Assigned 85 transcription jobs for $85
     # => Remaining balance: $115.00

  [Wait...]


  tp-review 'Chad Interview'

     # => Gathering submissions from Amazon
     # => Matching submissions with local projects
     # =>
     # => Transcript for: https://ryantate42.s3.amazonaws.com/
            Chad%20Interview.29.00.263d492275a81afb005c8231d8d8afdb.
             UEMOCN.mp3
     # => Project: Chad Interview: Phone interview re Yahoo Hack Day
     # => Submitted at: 2012-08-11 17:00:36 -0700 by A9S0AOAI8HO9P
     # =>
     # =>   Chad: ... so it had sort of some geek history. And the
     # =>   weather was really bad. But it was an indoor event,
     # =>   right? So people were staying indoors. And like very
     # =>   early... And there was all this really expensive gear
     # =>   that the BBC had. Like these cameras that guys were like
     # =>   riding around on and stuff, huge sound stage, bigger than
     # =>   the one we had in Sunnyvale.
     # =>
     # =>   Two hours into the event, we heard this big lightning
     # =>   strike, because we were up on a hill in London. And all
     # =>   the lights went out and the roof opened up in the
     # =>   building. What we didn't know is the fire supression
     # =>   system in that building which got blown up by the
     # =>   lightning during a fire would cause the roof to open
     # =>   up. So we had all these geeks with equipment and all this
     # =>   BBC equipment and it was literally raining on them.
     # =>
     # => (A)pprove, (R)eject, (Q)uit, [(S)kip]? (1/20)

   a

     # => Approved. Chad Interview transcript updated.
     # =>
     # => Transcript for: https://ryantate42.s3.amazonaws.com/
            Chad%20Interview.30.00.263d492275a81afb005c8231d8d8afdb.
            RXNKRN.mp3
     # => Project: Chad Interview: Phone interview re Yahoo Hack Day
     # => Submitted at: 2012-08-11 17:00:58 -0700 by A9S0AOAI8HO9P
     # =>
     # =>   Blah blah blah blah okay I am done typing byeeeeeeee
     # =>
     # => (A)pprove, (R)eject, (Q)uit, [(S)kip]? (2/20)

  r

     # => Rejection reason, for worker:

  There's no transcription at all, just nonsense

     # => Rejected
     # =>
     # => Transcript for...
     # => ... [snip]


  tp-finish 'Chad Interview'

     # => Removing from Amazon
     # =>   Collecting all results
     # =>   Removing HIT 2GKMIKMN9U8PNHKK58NXL3SU4TCBSN (Reviewable)
     # =>   Removing from data/assignment.csv
     # =>   Removing from local cache
     # =>   Removing HIT 2CFX2Q45UUKQ2HXZU8SNV8OG6CQBTC (Assignable)
     # =>   Removing from data/assignment.csv
     # =>   Removing from local cache
     # =>   Removing HIT 294EZZ2MIKMNNDP1LAU8WWWXOEI7O0...
     # =>   ... [snip]
     # =>   Removing Chad Interview.00.00.
              263d492275a81afb005c8231d8d8afdb.ORSENE.html from
              ryantate42.s3.amazonaws.com
     # =>   Removing Chad Interview.01.00...
     # =>   ... [snip]
     # =>   Removing Chad Interview.00.00.
              263d492275a81afb005c8231d8d8afdb.RNTVLN.mp3 from
              ryantate42.s3.amazonaws.com
     # =>   Removing Chad Interview.01.00....
     # =>   ... [snip]
If you have additional questions, they may be answered in the section “Usage: Additional details” below, or in one of the links in the “More” section, also below.
Installation
There are four broad steps to install Typingpool:
- Configure your Amazon account.
- Install prerequisites(rvm, audio tools, Ruby, and perhaps a package manager).
- Install the Typingpool gem.
- Run tp-config.
1. Configure your Amazon account
The below assumes you’ve already got an account on Amazon.com that you want to begin using for Mechanical Turk and Typingpool. It walks you through signing up for Amazon Mechanical Turk, Amazon S3, and obtaining the security credentials you’ll use to configure Typingpool later.
Visit requester.mturk.com. Click “Create an Account” in the top right corner. If prompted, sign in with your usual Amazon account. Fill out the “User Registration” page, using your own name for “Company Name” (unless you personally have your own named business entity).
After you’ve created your account, you’ll want to put some money in it to cover the cost of your first Mechanical Turk assignment. If you don’t have plans to immediately use Typingpool/Mechanical Turk, you can skip this step.
To fund your first assignment, click “Account Settings” in the top right corner. Then click “Prepay for Mechanical Turk HITs” under the section “Your Balance.” You’ll be prompted to enter an amount. Put in just enough to cover your first assignment:
minutes of audio
-times-
how much you’re willing to pay per minute (default $0.75)
-times-
1.1 (to cover the 10% Amazon surcharge).
So for 60 minutes of audio at $0.75, you’d put in $49.50.
There’s no automated way to get your prepaid balance refunded, so only pre-pay what you plan to immediately use, at least at first.
After entering the amount, click “Continue to Amazon Payments.” You might be prompted to log in with your Amazon account again. You’ll be prompted to add a credit card and to confirm the amount of the pre-pay.
Next you’ll need to sign up for Amazon S3, or Simple Storage Service. This is the website Typingpool uses to make your audio files available to transcribers around the world.
Visit aws.amazon.com/s3. Click “Sign Up” near the top right corner. You may be prompted to sign in. Use your usual Amazon account.
Fill out the contact information form.
Enter your credit card details. Amazon S3 will charge small amounts for when Typingpool uses it to temporarily host your audio. These fees are a tiny fraction of what you spend on transcription. For example, I paid 1.08 cents to host an hour-long mp3 on S3 for three days versus $49.50 for the workers and Mechanical Turk fees.
At this stage, you may be prompted for a phone number to verify your identity. The call is automated and painless.
Your account will either be confirmed or Amazon will promise to email you when it’s confirmed. In my experience, Amazon may “forget” to send this email even when your S3 account is up and running.
Next you will need to obtain Amazon S3 security credentials for use with Typingpool. Go to aws.amazon.com and open the “My Account” menu near the top right corner. When the menu opens, select “Security Credentials” at the bottom.
Scroll down to the “Access Credentials” section, which contains a subsection called “Accesss Keys,” which contains a subsection called “Your Access Keys.” There should already be one key, if not click “Creare a new Access Key.”
Copy the letters under “Access Key ID,” then paste them somewhere you can get to later, like a text file or Word doc. Click “Show” under “Secret Access Key,” then copy the secret access key, then paste it under your access key. You’ll use both these keys later to set up Typingpool.
2. Install prerequisites
In this section you’re going to install the various bits of external software Typingpool needs in order to run. There are quite a few such bits!
You’ll need rvm, the Ruby Version Manager, since Typingpool needs a newer version of Ruby than presently ships with any Mac or Ubuntu Linux system.
You’ll need audio tools like ffmpeg and other miscellaneous prerequisites (xml and zip libraries, etc.).
You’ll need a Ruby of version 1.9.2 or better.
If you’re installing on a Mac, you’re also going to install a general package manager called Homebrew (or MacPorts, if you prefer, see instructions in parenthesis). The package manager will let you more easily install the audio programs Typingpool needs.
Don’t worry, I’ve tested this process on something like nine different system configurations and will walk you through it. Find your operating system below to begin.
Jump to:
- Mac OS X 10.8 Mountain Lion
- Mac OS X 10.7 Lion
- Mac OS X 10.6 Snow Leopard
- Ubuntu Linux 12.10 Quantal Quetzal
- Ubuntu Linux 12.04 Precise Pangolin
- Ubuntu Linux 10.04 Lucid Lynx
Mac OS X 10.8 Mountain Lion and
Mac OS X 10.7 Lion
- Make sure your Mac is up to date: Select Apple menu/Software Update. Install any updates.
- Install Xcode from the Mac App Store: Open the Mac App Store, search for Xcode, and click Install. Finish the install by launching Xcode and installing device component support when prompted.
- Install Xcode command line tools: Launch Xcode, select Xcode/Preferences from the menus, select the Downloads tab, and click Install next to Command Line Tools.
- Install rvm(Ruby Version Manager): Launch the Terminal (click on the magnifying glass on the top right of your screen, type Terminal, and select the Terminal application). Type
curl -L https://get.rvm.io | bash -s stable
and hit the Return key. Respond to any prompts in the affirmative.
- Close and re-open the Terminal window to load rvm: Close the current Terminal window by clicking the red button in the top left corner of the window. Open a new Terminal window by selecting the Shell menu and then “New Window.”
- Install Homebrew: In the Terminal, type
ruby -e "$(curl -fsSkL raw.github.com/mxcl/homebrew/go)"
and hit Return. Respond to any prompts in the affirmative. Leave the Terminal window open.
(Or, install Macports: Go to http://www.macports.org/install.php, select the installer for your OS X version, download it, and launch it. Respond to any prompts in the affirmative.)
- Install dependencies: In the Terminal, type
brew tap homebrew/dupes
and hit Return. Then type
brew install autoconf automake openssl libksba ffmpeg mp3splt mp3wrap apple-gcc42
and hit Return. This can easily take 45 minutes since many basic Unix tools must be compiled. Afterward, leave the Terminal window open.
(Or, for Macports: In the Terminal, type
sudo port install gettext apple-gcc42 openssl curl-ca-bundle ffmpeg mp3splt mp3wrap libxslt libxml2 libiconv zlib
and hit Return. You will eventually be prompted to install Java SE; respond in the affirmative. If you wait too long to respond to the Java SE prompt, you may need to re-type the line above. The whole process can easily take 1 hour 45 minutes since a whole universe of basic Unix tools must be compiled.)
- Install and select Ruby: In the Terminal, type
rvm install 1.9.3 --with-opt-dir=/usr/local/opt
and hit Return. Then type
rvm use 1.9.3 --default
and hit Return. Leave the Terminal window open.
Mac OS X 10.6 Snow Leopard
- Make sure your Mac is up to date: Select Apple menu/Software Update. Install any updates.
- Install Xcode: You’ll need to do this from your original system DVD from Apple. Insert the OS X Install DVD into your Mac, open the DVD icon from your Desktop (if needed), open the Other Installs folder, double click on Xcode.mpkg. Follow the prompts to install Xcode with command line tools.
- Update Xcode: Select Apple menu/Software Update. There should be an update to bring Xcode to version 3.2.6.
- Install rvm(Ruby Version Manager): Launch the Terminal (click on the magnifying glass on the top right of your screen, type Terminal, and select the Terminal application). Type
curl -L https://get.rvm.io | bash -s stable
and hit the Return key. Respond to any prompts in the affirmative. Leave the Terminal window open.
- Close and re-open the Terminal window to load rvm: Close the current Terminal window by clicking the red button in the top left corner of the window. Open a new Terminal window by selecting the Shell menu and then “New Window.”
- Install Homebrew: In the Terminal, type
ruby -e "$(curl -fsSkL raw.github.com/mxcl/homebrew/go)"
and hit Return. Respond to any prompts in the affirmative. Leave the Terminal window open.
(Or, install Macports: Go to http://www.macports.org/install.php, select the installer for your OS X version, download it, and launch it. Respond to any prompts in the affirmative.)
- Install dependencies: In the Terminal, type
brew install ffmpeg mp3splt mp3wrap
and hit Return. Leave the Terminal window open.
(Or, for Macports: In the Terminal, type
sudo port install ffmpeg mp3splt mp3wrap
and hit Return.)
- Install and select Ruby: In the Terminal, type
rvm install 1.9.3 --disable-binary
and hit Return. Then type
rvm use 1.9.3 --default
and hit Return. Leave the Terminal window open.
Ubuntu Linux 12.10 Quantal Quetzal
and Ubuntu Linux 12.04 Precise Pangolin
and Ubuntu Linux 10.04 Lucid Lynx
Special notes for the desktop and server versions of these operating systems, and for 10.04 Lucid Lynx, will be noted in parenthesis.
- Update packages: From the terminal, type
sudo apt-get update
sudo apt-get upgrade
- Install dependencies: From the terminal, type
sudo apt-get install ffmpeg mp3splt mp3wrap curl libssl-dev libxml2-dev libxslt-dev libavcodec-extra-53 zlib1g-dev build-essential libyaml-dev libreadline-dev
(For 10.04 Lucid Lynx, type
sudo apt-get install ffmpeg mp3splt mp3wrap curl libssl-dev libxml2-dev libxslt-dev libavcodec-extra-52 zlib1g-dev build-essential libyaml-dev libreadline-dev
)
- Install rvm and Ruby: From the terminal, type
curl -L https://get.rvm.io | bash -s stable --ruby
- Configure the Terminal app for rvm(Ubuntu Desktop only): Select Edit/Profile preferences, select Title and Command, check “Run command as login shell.”
- Update your current shell: From the terminal, type
source ~/.rvm/scripts/rvm
(Ubuntu Desktop users may skip this step and simply open a new tab within the Terminal app.)
- Select ruby: From the terminal, type:
rvm use 2.0 --default
3. Install the Typingpool gem
From a terminal window (or the Terminal app on Mac), type
gem install typingpool
and hit Return.
4. Run tp-config
From a terminal window (or the Terminal application on Mac), type
tp-config
and hit Return. When prompted for you Amazon Access Key ID, paste the first string you copied into a file at the end of step 1. When prompted for your Amazon Secret Access Key, paste the second string you copied into a file at the end of step 1. At all other prompts, it is fine to just hit Return to accept the default.
Frequently Anticipated Questions
Why won’t it work on Windows?
Typingpool relies heavily on some Unix-specific audio tools, including ffmpeg. Max OS X and Linux are both essentially Unix systems that can run these tools natively. Windows is not.
Why not just use a transcription service?
You should absolutely use a transcription service if you’re comfortable with the cost and turnaround time. There is even onethat farms the work out to Mechanical Turk, making it somewhat more affordable.
Typingpool is a good alternative if you are looking for lower costs and/or faster turnaround. By chopping the file into chunks that can be transcribed in parallel, you can get a finished transcript faster. By dealing with end workers yourself, you can get a lower price.
You also end up with audio embedded every paragraph or so in your transcript, a nifty feature that makes it very easy to double check quotes. As far as I know, no transcription service offers that.
Isn’t the quality poor?
The quality is lower than with a professional transcription service, and that’s precisely the point. Typingpool is a “worse is better” solution that works well in certain cases. It is cheap and fast, but rough and provisional. It’s a great tradeoff if you want to skim and search the transcript and then easily -– thanks to the embedded audio every paragraph or so – double-check the text. This works well if you’re trying to remember a quote for a work of journalism.
Conversely, you shouldn’t use Typingpool to produce a transcript of your multi-billion-dollar corporation’s quarterly earnings call, or to create a legal document to submit to a court –- at least not without double checking every single word against the audio.
Does Typingpool help exploit workers?
Like any tool, Typingpool could probably be used that way. Please don’t use it that way! Typingpool defaults to paying $0.75 a minute, and I often offer $1.00/minute, which produces transcripts very quickly, tends to attract better workers and is still roughly half the best rate I’ve seen for high-speed professional transcription. I have had success completing transcripts at lower rates, and Baio four years ago was able to findplenty of workers at $0.40/minute. But lower prices generally translate to slower transcription and lower quality.
Also, bear in mind that just because you pay Mechanical Turk workers a lower rate through Typingpool than you’d pay a service doesn’t mean the workers are actually getting paid less or are worse off. The money you pay to a professional transcription service with high accuracy will typically pay for multiple people to work on each section, and will also support the overhead of managers who delegate the work. With Typingpool you are doing the management work yourself, paying workers directly, and accepting lower accuracy. This helps explain why the professional transcription jobs I have come across on Mechanical Turk have always paid a fraction of the rate I offer directly to workers.
What sort of work should I reject?
Up to you. You should take a look at Amazon’s Mechanical Turk requester best practices guide. My own philosophy is that I generally only reject assignments when it looks like someone failed to put in much work. You’ll sometimes find people submit empty assignments, or nonsensical assignments. They are hoping you will fail to review the assignment before the (mandatory) auto-approval deadline and then they will get paid.
When someone submits very bad work, for example because they seem to have issues with idiomatic English, I will often approve the work and then block them so they can no longer submit future work. Typingpool is careful to always show you the worker ID associated with an assignment, but you must go onto the Mechanical Turk web interface to ban people.
Usage: Additional details
- When you want to preview your assignments, run tp-assign with the −−sandbox option and with −−qualify ‘rejection_rate < 100’ (to make sure you qualify to view your own HITs). Then visit http://workersandbox.mturk.com and find your assignments (a seach for “mp3” works if you left mp3 set as a keyword in your config file). When you are done previewing, run tp-finish with the name/path of your project and the −−sandbox option.
When you assign your transcription jobs via tp-assign, you must supply a template name or relative path as the second argument. In the example above, the named template is “interview/nameless.”
The template “interview/nameless” is a great general-purpose template. It instructs the transcriber not to worry about the names of the speakers, and instead to use labels like “male 1,” “male 2,” etc. This allows the transcriber to work quickly and usually results in a viable transcript, since you can consult your memory or the original audio to figure out who is who.
To find what other templates are available, navigate to the directory where typingpool is installed (`gem which typingpool`) and then go into lib/typingpool/templates/assignment and its subdirectories. Anything that ends in ‘.html.erb’ is an available template. You may also create your own templates in the directory listed in the “templates” param of your config file.
The templates interview, interview/phone, and interview/noisy require you to have passed the names of two voices to tp-make when you created your project. The first voice should be the name (and optional title) of the interviewer, and the second the name (and title) of the interviewee, like so:
tp-make 'Chad Interview' chad1.WMA chad2.WMA --voice ‘Ryan, hack reporter’ --voice ‘Chad, a software engineer’ --unusual 'Hack Day, Yahoo' --subtitle 'Phone interview re Yahoo Hack Day'- When you’ve rejected some submissions in tp-review and need to re-assign these chunks to be transcribed, simply re-run tp-assign with the name (or path) of your project. You may select the same template, reward, deadlines, etc., or pick new ones. tp-assign will be careful not to re-assign chunks for which you have approved a transcript, or which are pending on Mechanical Turk.
- When some chunks previously assigned via tp-assign have expired without attracting submissions, simply re-run tp-assign as described above to re-assign these chunks. Consider increasing the dollar amount specified in your −−reward argument.
- When some chunks previously assigned via tp-assign have been submitted by workers but not approved or rejected in time for the approval deadline (assign/approval in your config file or –approval as passed to tp-assign), Mechanical Turk has automatically approved these submissions for you and you’ll need to run tp-collect to collect them. (Yes, it’s silly you need run a whole different script instead of just calling tp-review as usual. I’ll fix this in a future version.)
- When you want to cancel outstanding assignments, simply run tp-finish with the name of your project. If your assignments have already attracted submissions, you may be prompted to run tp-review first.
- When tp-make, tp-assign, or tp-finish tells you it failed an upload, deletion, or Amazon command, simply re-run the script with the same arguments to re-attempt the upload, deletion or Amazon command. Typingpool carefully records which network operations it is attempting and which network operations have completed. It can robustly handle network errors, including uncaught exceptions.
Maintenance
Cache: If the cache file grows too large, you’ll need to delete it manually. It may be safely deleted as long as no Typingpool scripts are running. Its location is specified in the 'cache’ param in the config file. (The config file is at ~/.typingpool and the cache, by default, is at ~/.typingpool.cache.)
Typingpool takes no steps to limit the size of the cache file. It prunes the cache of project-specific entries when you run tp-finish on a project, but the cache may grow large if you work on many active projects in parallel, or if you fail to run tp-finish on projects when you are done with them.
- tp-finish: You should run tp-finish PROJECT each time you finish a project, where PROJECT may be either the project name or path. Assuming you have no submissions pending or awaiting approval, this clears all traces of the project from Amazon Mechanical Turk, from Amazon S3 or your SFTP server, and from the local cache. This will keep your local cache from balooning in size and will minimize your S3 charges or SFTP disk usage. It will also help Typingpool scripts run faster by reducing the number of HITs you have on Amazon Mechanical Turk; many Typingpool operations involve iterating through all of your HITs.
Problems?
If you hit any issues, or think you’ve found a bug, please feel free to email me: ryantate@ryantate.com
Source
If you’re a ruby user, you can obtain the Typingpool source code by typing on the command line:
gem install typingpool
The source code is also available on Github: https://github.com/ryantate/typingpool
Typingpool is distributed under the MIT license.
More
- Run any script with the −−help option for further details on how to run the script (e.g. `tp-make −−help`).
- See the docs for Typingpool::Config (`ri Typingpool::Config`) for details of the config file format.
- See Amazon’s Mechanical Turk documentation for guides and overviews on how Mechanical Turk works:
- See the documentation on ffmpeg (`man ffmpeg`) and related libraries for clues as to how to make Typingpool support additional file formats. Typingpool can work with any file format that ffmpeg can convert to mp3 (libmp3lame). You may need to install a lib via your package manager to enable this.
- For an overview of the concepts on which Typingpool is built, see Andy Baio’s guide to using Mechanical Turk for transcription.
My favorite fall meal (so far)

I’ve made the below meal twice so far this fall and it’s fantastically autumnal. Also, fairly forgiving to prepare. I basically stumbled across the main course flipping through one of my go-to cookbooks after aimlessly picking up a handsome chunk of pork shoulder from the butcher. Words like “with Cider and Cream” tend to jump out at me.
Shoulder of Pork with Cider and Cream
American Cookery, James Beard.
Online recipe (photo)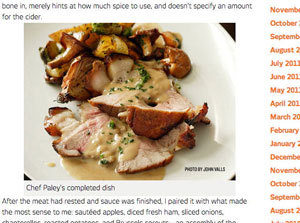
Basting seems to be out of fashion right now, but it really works here; you’ll be able to taste the apple cider in the finished roast, and the juice that doesn’t stick to the meat or (blackened) to the pan will end up flavoring the cream gravy. The apple flavor compliments the nutmeg/ginger/salt rub very well.
Notes:
- You’ll notice the recipe is technically for a “leg of pork;” Beard says later in the chapter to treat shoulder “in the same fashion as leg of pork.”
- My copy of the cookbook (1972) calls for an internal temp of 165. You’ll notice the one on the website calls for an internal temp of 145. Between you and I, an internal temp of 130 when removing from the oven is probably ideal, assuming high quality meat (if the meat is cheap/factory farmed, go to 145). You’ll get an extra 5-10 degrees in the center after resting.
- The recipe calls for a ~10 pound roast, a whole shoulder or leg. I used a partial shoulder about half that weight each time. That ran about $40 at my fancy schmancy butcher, but you’ll obviously get a lot of mileage out of that much meat.
- He does a thing where you flame the roast with applejack. I forgot to do this the first time and honestly I’m not sure it made any difference at all. The second time I forgot to remove my insta-read thermometers before flaming so now they look like this. Anyway, don’t go out and buy a bottle of applejack for this recipe.
- If you do a half recipe you’ll likely end up with some blackened apple cider on the bottom of your pan (there are fewer fat drippings to absorb heat and keep the cider from steaming and reducing). Don’t panic, everything is fine. The black bits will stick and stay out of the drippings you use for the gravy, and you can get them off with some Bon Ami or Comet after an overnight soak. (To minimize this, go heavier on the basting, and baste more frequently, early in the cooking, to cool off the bottom of the pan.)
- Notice how the gravy involves pan juices, heavy cream, butter, and egg yolks? To pour on your fat laden shoulder roast? Ha ha, delicious heart disease. Anyway, you can skip the whole last part of the gravy recipe, where you stir in the yolk(s) and remaining cream. I did this on accident the first time and frankly I thought the gravy was better. It’s, uh, just a little heavy with the yolks and extra cream in there.
- If you do a half roast (5 lbs), don’t forget to cut the gravy recipe in half too!
Buttermilk mashed potatoes
The Zuni Cafe Cookbook, Judy Rodgers.
Online recipe
This is one of the top two or three standout recipes in this fantastic cookbook, along with the famous Zuni Roast Chicken with Bread Salad, the sublime rosemary roast potatoes, and the wonderful polenta, hanger steak, short ribs, oxtail, and brasato recipes (among others!) You should buy this cookbook! “The Practice of Salting Early” section alone is worth the cover price. If you are a meat eater, it will change your life. Or should, at least.
Notes:
- The online recipe lists milk and cream/half-and-half. Do milk or cream or half-and-half, 2-3 tablespoons total.
- Rodgers recommends that the milk/cream/half-and-half (but not the buttermilk) be hot when mixing in. I achieve this by putting it in a pan set on the stovetop (not a burner) as the roast cooks in the oven. You’ll want to add an extra tablespoon or so if you do it this way in case it reduces.
- Rodgers recommends the butter be just melted. You can microwave or do as with the milk in the bullet above.
- Rodgers says to serve immediately “or keep warm, covered, in a double boiler, for up to 30 minutes.” I think it’s actually superior after 10-30 minutes in the double boiler because it will be warmer than if you serve it straightaway. Also, it greatly reduces the stress of timing the different courses since now you have a broader window for serving. If you do the double boiler, it’s easiest to reserve the water you boiled the potatoes in, since it will already be hot.
- Don’t slack on the whipping, especially after the last addition (butter). Get the potatoes nice and fluffy! (The potatoes in the image above are underwhipped.) And make sure there is enough salt in there.
- Did you buy the cookbook yet? Go buy it! The roast chicken and bread salad are just staggering.
Fennel Baked in Stock and Tomato Sauce
Adapted from How To Cook Everything, Mark Bittman.
Online recipeThe strong anise flavor of the fennel stands up well to all the fatty flavor in the other dishes, as does the tomato sauce.
The original Bittman recipe is just “baked in stock” but I was lacking in stock so filled around half the required liquid with juice from my whole canned tomatoes (think San Marzano or Muir Glen). The rest was either stock and/or water with wine and/or dry vermouth. The recipe is typical of Bittman - simple, easy, absolutely delicious (buy his cookbook too, if you haven’t).
Notes:
- Replace half the stock with tomato sauce, such as the juice from a can of San Marzano whole tomatoes.
- Pretty sure I skipped the Parmesan. You’re, uh, probably getting enough dairy in the other two dishes.
Eat with a hearty, casual red table wine (Côtes du Rhône, Sangiovese, Syrah, etc.) or a nice beer. Happy autumn!